
PKTRON
Pakistan Tron Quantum Simulator
The First 100 Qubit Quantum Simulator for Circuit Design and Algorithms
WELCOME TO PKTRON

PKTron is Pakistan’s first open-source quantum computing simulation library, designed to empower researchers, students, and developers to explore quantum circuits, algorithms, and visualizations with support for up to 100 qubits (version 0.1.6). Built for accessibility and flexibility, PKTron offers a robust platform for constructing quantum circuits, implementing a wide range of quantum algorithms, and visualizing quantum states with both static and interactive tools. With support for multiple simulation backends and machine learning integration, PKTron is ideal for education, research, and prototyping quantum applications.
The core of PKTron is the pktron package, which provides a comprehensive suite of tools for quantum circuit simulation, algorithm implementation, and advanced visualizations. Its modular design allows seamless integration with external libraries and encourages contributions to its growing ecosystem. PKTron’s workflow involves mapping quantum problems, constructing circuits, simulating with chosen backends, and visualizing or post-processing results.
Some of the most useful features of PKTron include:
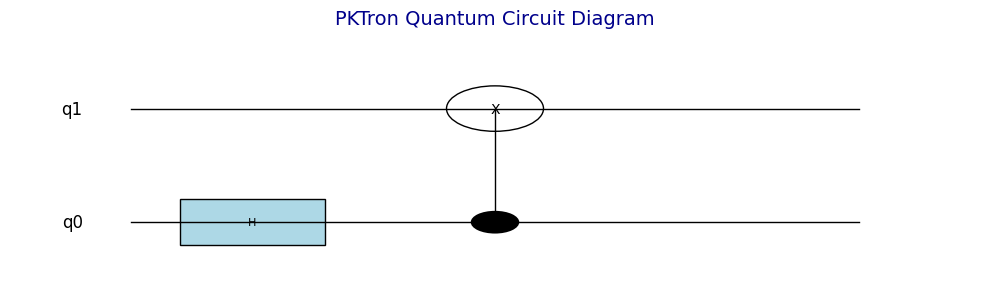
- Circuit Construction Tools (pktron.quantum): Initialize and manipulate quantum circuits with the QuantumCircuit class, supporting single-qubit gates (Hadamard, Pauli X/Y/Z, S, T, rotations), two-qubit gates (CNOT, CZ, CY, SWAP), and three-qubit gates (Toffoli), along with measurement and state normalization capabilities.
- Gate Library (pktron.gates): A comprehensive set of quantum gates, including Hadamard, Pauli, phase, rotation, CNOT, CZ, CY, SWAP, and Toffoli gates, with support for statevector updates and gate history tracking for circuit visualization.
- Algorithm Library (pktron.algorithms): Implement standard quantum algorithms like Quantum Fourier Transform (QFT), Phase Estimation, Shor’s Period Finding, Variational Quantum Eigensolver (VQE), Quantum Approximate Optimization Algorithm (QAOA), Harrow-Hassidim-Lloyd (HHL), Grover’s Search, and BB84 Quantum Key Distribution (QKD), alongside custom algorithms (quantum_flip, super_quantum_dance, quantum_treasure_hunt, quantum_magic_spin) for educational purposes.
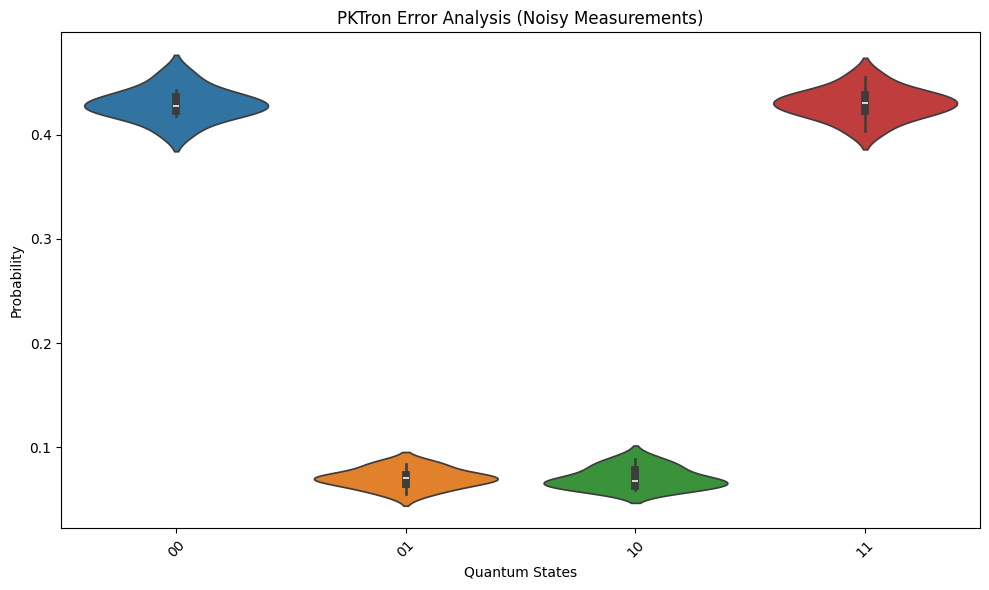
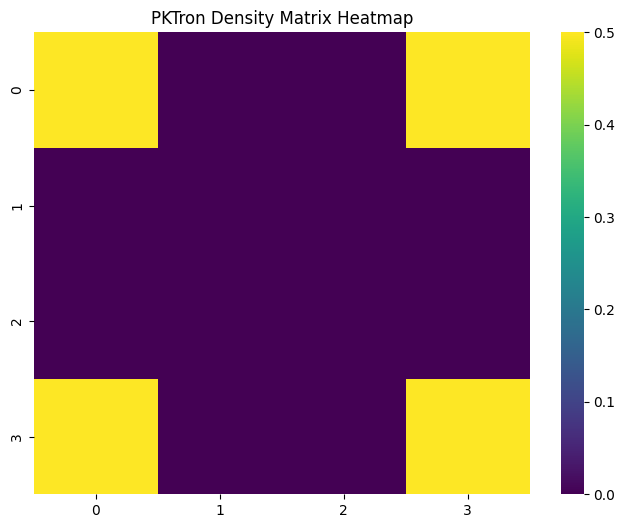
- Visualization Tools (pktron.visualization): Generate circuit diagrams, 3D histograms, Bloch spheres (static and interactive), density matrix heatmaps, and error analysis plots using Matplotlib, Plotly, Seaborn, and QuTiP, with support for animated GIFs to visualize state evolution.
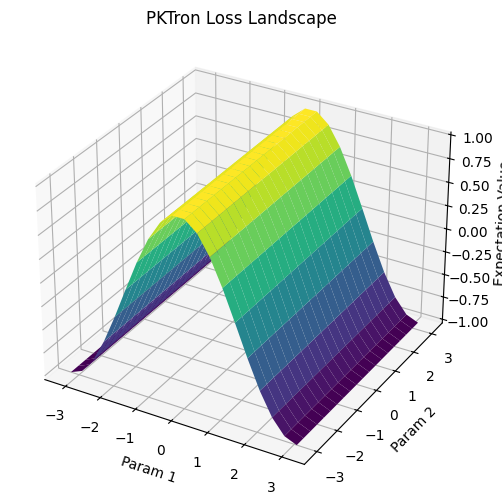
- Machine Learning Integration (pktron.ml_visualization): Build variational quantum circuits using PennyLane and visualize loss landscapes to explore quantum-classical hybrid algorithms and optimization dynamics.
- Simulation Backends (pktron.backend): Choose from StatevectorSimulator for exact state evolution, StabilizerSimulator for efficient Clifford circuit simulation, or MPS_Simulator for large-scale systems using Matrix Product States, with configurable shot-based execution and noise simulation support.
Core Libraries
PKTron depends on the following Python libraries to deliver its functionality:
- NumPy (>=1.21.0): For numerical computations and matrix operations in circuit simulations and algorithms.
- PennyLane (>=0.38.0): For variational quantum circuits and machine learning integration.
- Matplotlib (>=3.4.0): For static visualizations like circuit diagrams, histograms, and Bloch spheres.
- Quimb (>=1.4.0): For Matrix Product State simulations in the MPS backend.
- NetworkX (>=2.8.0): For graph-based operations in algorithms like QAOA.
- Plotly (>=5.0.0): For interactive visualizations such as histograms and Bloch spheres.
- Seaborn (>=0.11.0): For statistical visualizations like violin plots in error analysis.
- QuTiP (>=4.6.0): For quantum state and density matrix operations in visualizations.
- ImageIO (>=2.9.0): For creating animated GIFs of density matrix evolution.
- Build and Twine: For packaging and distributing PKTron.
Installation
To install PKTron and its dependencies, run:
pip install pktron
PKTron is designed to be extensible, allowing developers to create additional tools and interfaces that enhance its core functionality. Its modular structure, with clearly defined modules for circuits, gates, algorithms, visualizations, and backends, fosters integration with other quantum computing frameworks and encourages contributions to the open-source community. PKTron is licensed under the MIT License, promoting collaboration and innovation.
Explore more examples and tutorials. PKTron is committed to advancing quantum computing education and research, making it an ideal tool for anyone looking to explore the quantum world. Start your quantum journey with PKTron today!
Visualizations
Try us!
Getting Started (Hello World)
To begin using PKTron, try this example:
from pktron import QuantumCircuit
# Create a 2-qubit circuit (from usage example)
qc = QuantumCircuit(2)
qc.h(0) # Hadamard on qubit 0
qc.cnot(0, 1) # CNOT (control: 0, target: 1)
qc.draw() # Display circuit diagram
100 Circuits to use on PKTRON
Working with Visualizations in PKTron
PKTron delivers the most advanced and visually stunning tools for quantum computing and machine learning, setting it apart as the premier quantum simulation library. The pktron.visualization module offers static and interactive visualizations, including circuit diagrams, histograms, Bloch spheres for up to 10 qubits, density matrices, and error analysis plots. Enhanced by pktron.ml_visualization, PKTron provides unparalleled loss landscape visualizations for quantum-classical hybrid algorithms. Using Matplotlib, Plotly, Seaborn, and QuTiP, these tools enable deep insights into quantum states and dynamics, with unique support for animated outputs and 10-qubit Bloch spheres. This section demonstrates how to use these visualizations with circuits from PKTron’s usage and testing examples.
Key Visualization Features
The pktron.visualization module includes:
- Circuit Diagrams (QuantumCircuit.draw): Renders clear, colorful diagrams of quantum circuits, showing gates and qubit connections.
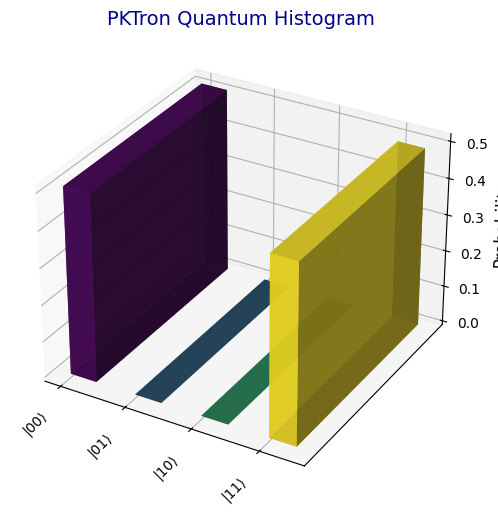
- Histograms (plot_histogram, plot_histogram_interactive): Displays measurement probabilities as 3D bar plots (static) or interactive plots for single or multiple circuits.
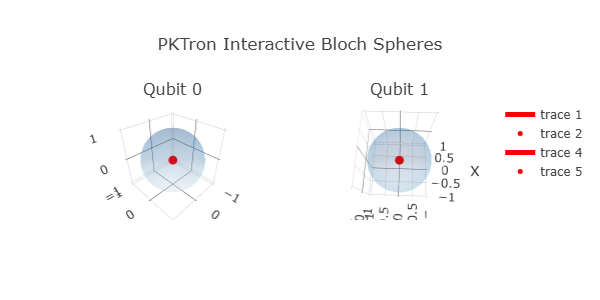
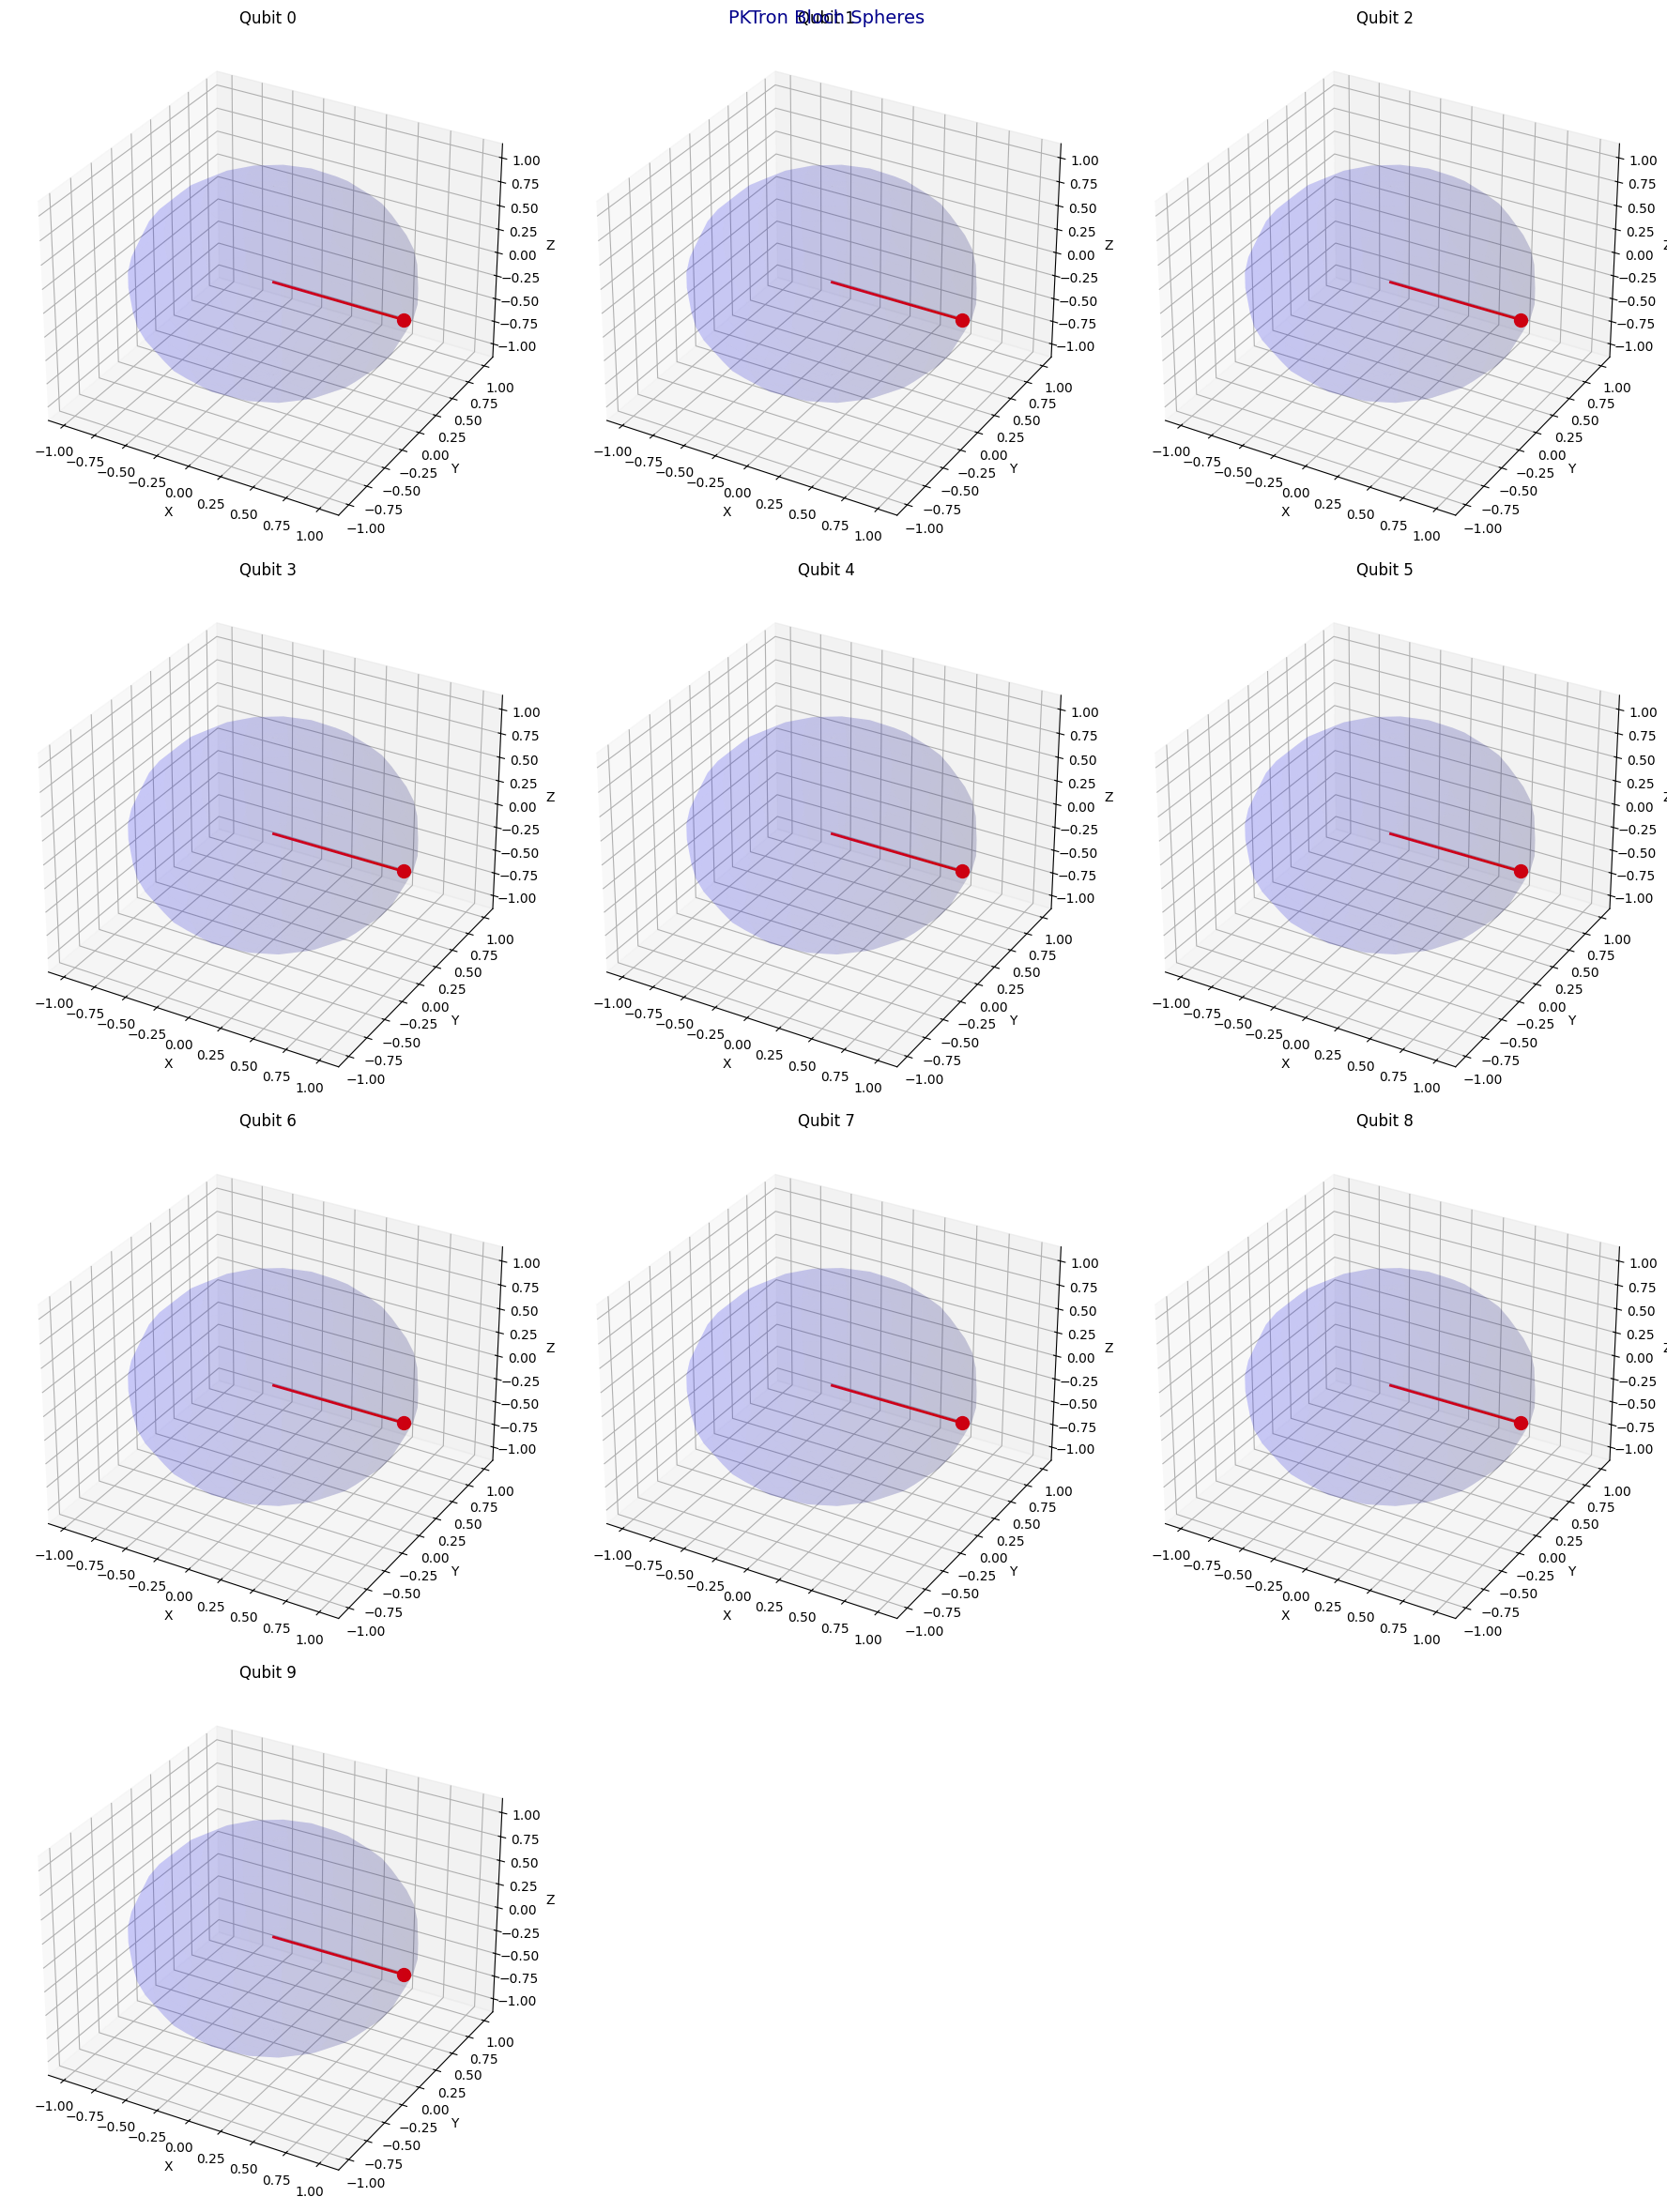
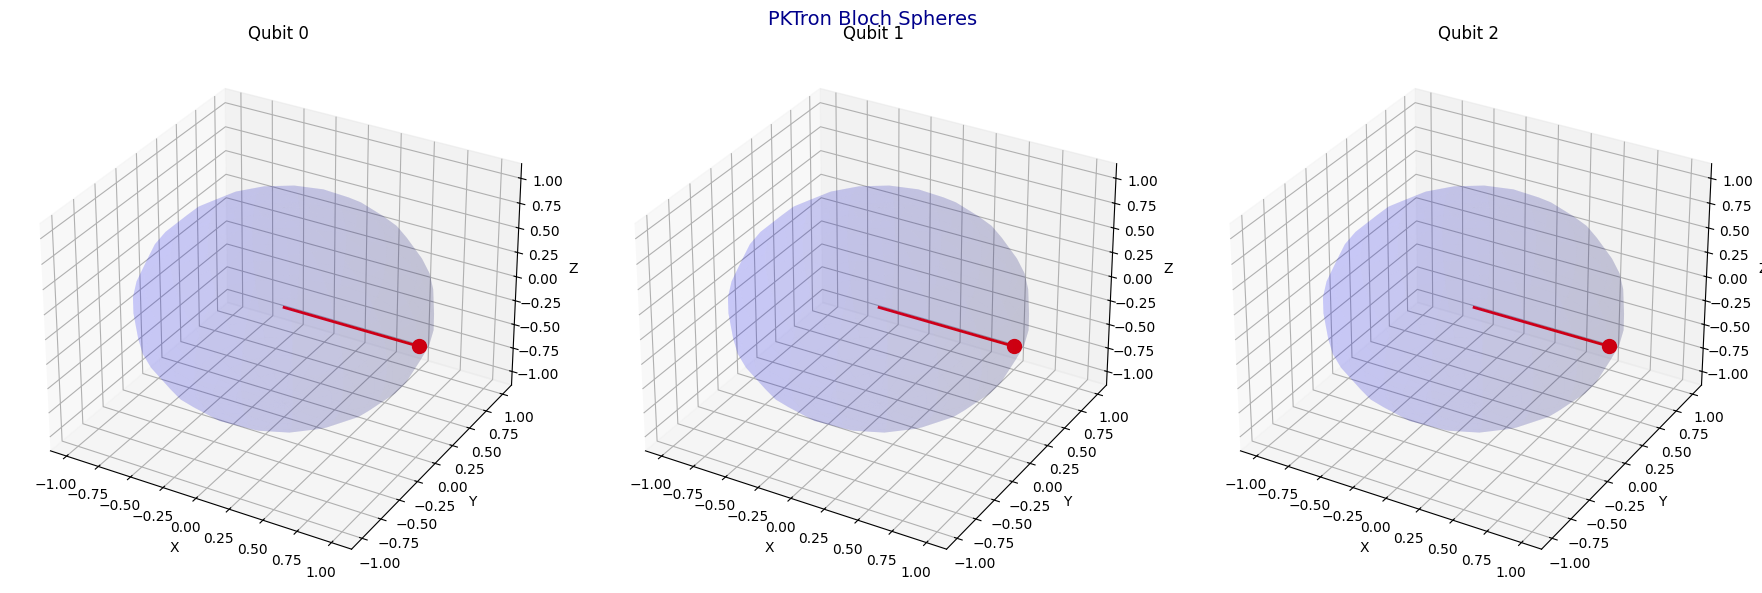
- Bloch Spheres (plot_bloch, plot_bloch_interactive): Visualizes qubit states on Bloch spheres for up to 10 qubits, with static or animated interactive options, a unique feature in quantum simulation.
- Density Matrix (plot_density_matrix): Creates vibrant heatmaps of density matrices, with optional animated GIFs for state evolution.
- Error Analysis (plot_error_analysis): Generates violin plots to study measurement distributions under noise.
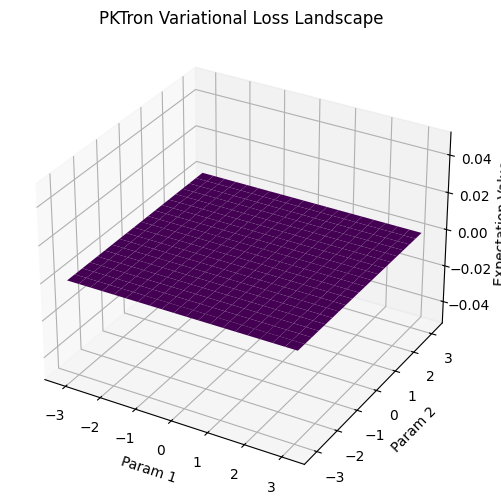
- Machine Learning Visualizations (pktron.ml_visualization): Produces best-in-class loss landscape plots for variational quantum circuits, ideal for VQE and QAOA.
These visualizations require the statevector backend for most functions (except plot_histogram, which supports stabilizer and MPS backends).
Prerequisites
Ensure PKTron is installed (see Installation). Required libraries (Matplotlib, Plotly, Seaborn, QuTiP, ImageIO) are included with pip install pktron. For interactive visualizations, use a browser-compatible environment (e.g., Google Colab, VS Code with Jupyter) and ensure a stable internet connection for Plotly.
Installing PKTRON on Platforms
Installing PKTron
PKTron is distributed as a Python package via PyPI and can be installed in various development environments. Below are step-by-step instructions for installing PKTron in Google Colab, using the Command Prompt (CMD) on Windows, and in Visual Studio Code (VS Code). Ensure you have Python 3.7 or higher installed in your environment. PKTron requires several dependencies (NumPy, PennyLane, Matplotlib, Quimb, NetworkX, Plotly, Seaborn, QuTiP, and ImageIO), which are automatically installed when using pip install pktron.
Installing in Google Colab
Google Colab provides a cloud-based Jupyter notebook environment with Python pre-installed. To install PKTron, use a code cell in your notebook. The installation process may take a few minutes due to the dependencies.
Steps:
- Open or Create a New Colab Notebook: Go to colab.research.google.com and start a new notebook or open an existing one.
- Run the Installation Command: In a code cell, enter and execute the following command:
!pip install pktron
- The ! prefix runs shell commands in Colab.
- This will download and install PKTron along with its dependencies.
- Verify the Installation: In the next code cell, test the import:
- If no errors occur, the installation is successful.
- Optional: Restart Runtime: If you encounter import issues, go to Runtime > Restart runtime in the menu and re-run your cells.
Notes for Colab:
- Colab sessions are temporary; reinstall PKTron in each new session.
- For large simulations (e.g., MPS backend with many qubits), Colab’s free tier has resource limits—consider upgrading to Colab Pro for more RAM and GPU support.
- Visualizations (e.g., Matplotlib plots) will display inline automatically.
Installing in Command Prompt (CMD) on Windows
The Command Prompt (CMD) is a built-in Windows terminal for running Python package installations. Ensure Python is installed and added to your system’s PATH.
Prerequisites:
- Install Python: Download and install Python 3.7+ from python.org. During installation, check “Add Python to PATH.”
- Verify Python: Open CMD (search for “cmd” in the Start menu) and run:
- It should show Python 3.7 or higher.
- Install pip (if needed): pip comes with Python, but verify with:
Steps:
- Open Command Prompt: Press Win + R, type cmd, and press Enter.
- Navigate to Your Project Directory (Optional): Use cd to change to your desired folder:
- Install PKTron: Run the following command:
- This installs PKTron and all dependencies. It may prompt for administrator privileges if needed—run CMD as Administrator (right-click CMD > “Run as administrator”).
- Verify the Installation: Test in the same CMD window:
- If successful, it will print the confirmation message.
Notes for CMD:
- If you get a “pip not found” error, reinstall Python with PATH enabled or use py -m pip install pktron.
- For virtual environments (recommended for projects), first create one:
- Uninstall with pip uninstall pktron if needed.
Installing in Visual Studio Code (VS Code)
Visual Studio Code is a popular code editor with excellent Python support via extensions. Installation can be done through the integrated terminal or the Python extension’s tools.
Prerequisites:
- Install VS Code: Download from code.visualstudio.com.
- Install Python Extension: Open VS Code, go to Extensions (Ctrl+Shift+X), search for “Python” by Microsoft, and install it.
- Install Python: Ensure Python 3.7+ is installed (as in CMD instructions). Select your Python interpreter in VS Code (Ctrl+Shift+P > “Python: Select Interpreter”).
Steps:
- Open VS Code: Launch VS Code and open your project folder (File > Open Folder) or create a new Python file (e.g., test_pktron.py).
- Open Integrated Terminal: Press Ctrl + ` (backtick) or go to Terminal > New Terminal. This opens a terminal at the bottom of VS Code (similar to CMD or PowerShell).
- Install PKTron: In the terminal, run:
- VS Code may prompt to use the selected Python interpreter—confirm if asked.
- Verify the Installation: Create or open a Python file and add:
- Run the file (right-click > “Run Python File in Terminal” or F5 for debugging).
- If it executes without errors, installation is successful.
Notes for VS Code:
- Use virtual environments for isolation: In the terminal, run python -m venv .venv, then activate with .venv\Scripts\activate (Windows) and install PKTron.
- The Python extension provides IntelliSense, debugging, and Jupyter support—great for PKTron visualizations.
- If using Jupyter notebooks in VS Code, install the “Jupyter” extension and run !pip install pktron in a cell, similar to Colab.
- Reload the window (Ctrl+Shift+P > “Developer: Reload Window”) if imports fail after installation.
Troubleshooting Common Issues
- Permission Errors: Run as administrator (CMD/VS Code terminal) or use –user flag: pip install pktron –user.
- Dependency Conflicts: Create a virtual environment to isolate PKTron.
- Slow Installation: Dependencies like QuTiP may take time; ensure a stable internet connection.
- Import Errors: Restart your environment (Colab runtime, CMD session, or VS Code) after installation.
- Version Check: After installation, run pip show pktron to confirm version 0.1.6 or later
For more advanced setups or custom builds from source, refer to the Building from Source section on the PKTron website. Once installed, explore PKTron’s features with the Getting Started examples!
Create Custom Quantum Circuits with PKTron (Easy Guide)
Thank you for exploring PKTron! With its powerful quantum computing tools and seamless integration with Python, you’re now ready to dive into quantum circuit simulations and visualizations. For further guidance, check out the official PKTron documentation, tutorials, and community forums on our website. Start building your quantum future today!